
Welcome to the Moto G Stylus user manual! This guide provides essential information to help you understand and utilize your smartphone’s features effectively. Explore setup, functionality, and troubleshooting tips to enhance your experience.
1.1 Overview of the Moto G Stylus
The Moto G Stylus is a versatile smartphone designed for creativity and productivity. It features a built-in stylus, perfect for note-taking and sketching, while offering a robust display and reliable performance. With a focus on user experience, the device combines sleek design with practical functionality. Its intuitive interface and customizable settings make it accessible to both new and experienced users. The Moto G Stylus is equipped with a high-capacity battery, ensuring extended usage on a single charge. Additionally, it supports expandable storage, allowing users to store more apps, photos, and files. Available in multiple color options, the Moto G Stylus caters to diverse preferences while maintaining a premium feel at an affordable price point. This smartphone is ideal for those seeking a balance between innovation and value, making it a standout choice in its category.
1.2 Importance of the User Manual
The Moto G Stylus user manual is an essential resource for optimizing your smartphone experience. It provides detailed guidance on setting up your device, understanding its features, and troubleshooting common issues. By referring to the manual, you can ensure safe and proper usage, avoiding potential damage to your phone. The manual also highlights tips for maximizing battery life, customizing settings, and leveraging the stylus for productivity and creativity. Whether you’re a first-time user or upgrading from a previous model, the manual offers clarity on new features and functionalities. It serves as a comprehensive reference, helping you unlock the full potential of your Moto G Stylus. Regularly consulting the manual ensures you stay informed about best practices, software updates, and security features, keeping your device running smoothly and securely.
1.3 How to Navigate the PDF Manual

Moto G Stylus Design and Hardware Overview
The Moto G Stylus features a sleek design with a large display, integrated stylus, and durable build. Available in multiple colors, it offers a premium feel, combining functionality with a modern aesthetic appeal effectively.
2.1 Key Features of the Moto G Stylus
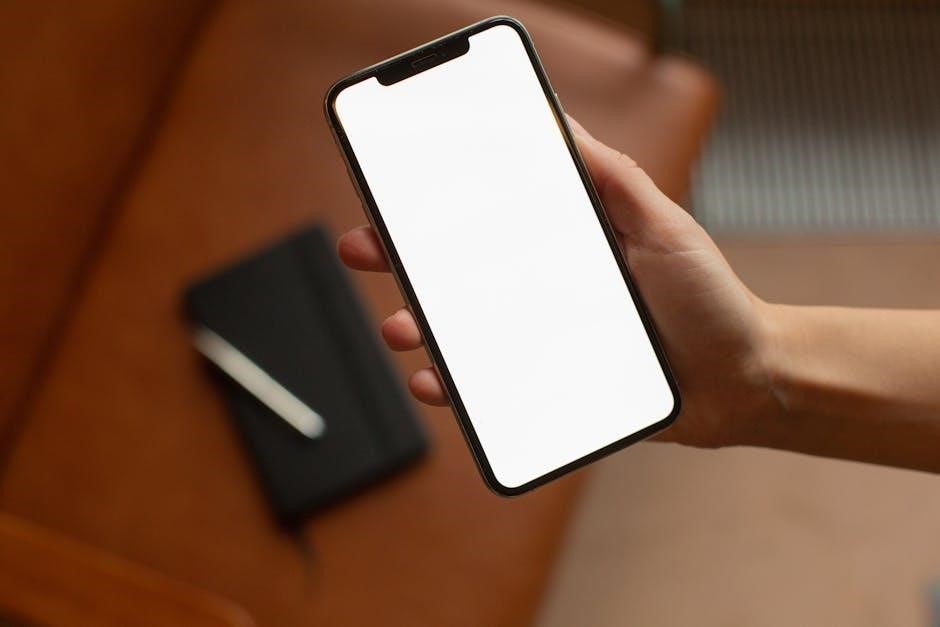
The Moto G Stylus is equipped with a range of impressive features, including a large, vibrant display and an integrated stylus for precise note-taking and creativity. It boasts a powerful processor, ample storage options, and a long-lasting battery. The device also includes advanced camera capabilities, enabling high-quality photography and video recording. Additionally, it supports fast charging, ensuring quick power-ups. The stylus itself is designed for smooth operation, making it ideal for both productivity and artistic tasks. With its sleek design and robust hardware, the Moto G Stylus offers a seamless user experience, catering to both everyday use and creative endeavors. These features make it a versatile and reliable choice for users seeking a balance between performance and affordability.
2.2 Hardware Specifications
The Moto G Stylus is powered by a robust processor, delivering smooth performance for multitasking and demanding apps. It features a large, high-resolution display, ensuring vibrant visuals and crisp text. The device is equipped with a long-lasting 5,000mAh battery, offering extensive usage on a single charge. With generous RAM and storage options, it handles data-intensive tasks efficiently. The phone includes a triple-camera setup, capturing stunning photos and videos, alongside a high-quality front camera for selfies. It supports fast charging, reducing downtime. The stylus is precision-engineered for accurate input, enhancing productivity and creativity. Built with durable materials, the phone combines style with resilience. These hardware specifications ensure a powerful and reliable smartphone experience, catering to both everyday use and creative pursuits. The Moto G Stylus balances performance and affordability, making it a standout choice in its category.
2.3 Stylus Pen Design and Functionality
The Moto G Stylus comes with a sleek, ergonomic stylus pen designed for precision and comfort. Its slim profile and rounded tip allow for accurate handwriting and navigation. The stylus is built with durable materials, ensuring long-term reliability. It supports pressure sensitivity, enabling natural writing and drawing experiences. Users can access shortcuts and customize actions through the stylus, enhancing productivity. The pen is easily stored in a dedicated slot on the phone, preventing loss. It also features low-latency performance, making it ideal for note-taking and creative tasks. The Moto Note app integrates seamlessly with the stylus, offering a variety of tools for annotation and organization. Whether you’re jotting down ideas or sketching, the stylus pen elevates your interaction with the Moto G Stylus, providing a versatile and intuitive tool for everyday use and creative expression.
2.4 Available Color Options and Build Quality
The Moto G Stylus is available in a range of stylish colors, offering users a choice to match their personal preferences. Options include sleek finishes like Black, White, and vibrant hues, ensuring a modern look. The phone features a robust build quality, with a durable plastic frame and a polished design that feels premium. The back panel is smooth to the touch, providing a comfortable grip. The phone’s construction is solid, with minimal flex, indicating strong build integrity. The overall design balances aesthetics and functionality, making it both visually appealing and practical for everyday use. Whether you prefer a classic look or a bold statement, the Moto G Stylus delivers a combination of style and durability, ensuring it stands out while withstanding the rigors of daily life. The attention to detail in its craftsmanship enhances the user experience, offering both reliability and sophistication.

Setting Up Your Moto G Stylus
Start by unboxing your Moto G Stylus and carefully removing the protective packaging. Insert the SIM and SD cards, then charge the battery fully before powering on the device for the first time.
3.1 Unboxing and Initial Setup
Unboxing your Moto G Stylus is an exciting experience. Carefully open the package and ensure all components are included, such as the phone, stylus, charger, USB cable, and user manual. Before turning it on, familiarize yourself with the device’s exterior, including the power button, volume controls, and ports.
- Locate the SIM card and SD card slots, usually found on the top or side of the phone.
- Gently remove the protective film from the screen to reveal the vibrant display.
- Charge the battery using the provided charger before first use to ensure optimal performance.
Once charged, press and hold the power button until the Motorola logo appears. Follow the on-screen instructions to select your language, connect to Wi-Fi, and set up your Google account. If you’re transferring data from an old phone, use the built-in transfer tool for a seamless experience.
3.2 Inserting SIM Card and SD Card
To ensure proper functionality, carefully insert your SIM card and SD card into the Moto G Stylus. Locate the SIM card and SD card slots, typically found on the top or side of the device. Use the provided SIM ejector tool to gently open the tray by inserting it into the small hole.
- Place the SIM card into the tray, ensuring it aligns with the gold contacts facing downward.
- If using an SD card, insert it into the adjacent slot, making sure it fits securely.
- Gently push the tray back into the phone until it clicks into place.
The Moto G Stylus supports up to 512GB of expandable storage via the SD card, enhancing your phone’s storage capacity. Always handle the cards by the edges to avoid damage and ensure they are compatible with your device. For further guidance, refer to the user manual or manufacturer’s instructions.
3.3 Charging the Battery for the First Time
Before using your Moto G Stylus, charge the battery fully to ensure optimal performance. Locate the USB-C port at the bottom of the device and use the provided Motorola charger and cable for the best results.
- Connect the USB-C cable to the charger and plug it into a power source.
- Gently insert the other end of the cable into the phone’s USB-C port, ensuring it fits securely.
- The charging indicator will appear on the screen, confirming the process has begun.
- Allow the battery to charge completely, which may take approximately 2-3 hours, depending on the charger’s speed.
For safety, avoid using third-party chargers that may not meet Motorola’s standards. Once fully charged, unplug the device to prevent overcharging. The Moto G Stylus supports fast charging, so you can quickly top up your battery when needed. Always monitor the charging process to ensure it completes successfully.

Using the Stylus and Productivity Features
Unlock your productivity with the Moto G Stylus, designed for precision and creativity. Discover how to use the stylus for note-taking, sketching, and more, while exploring features like the Moto Note app for enhanced efficiency;
4.1 Getting Started with the Stylus
Getting started with the Moto G Stylus is straightforward. First, carefully remove the stylus from its designated slot. Familiarize yourself with its ergonomic design, ensuring a comfortable grip for precise control. Before using the stylus, ensure your device is fully updated. Navigate to Settings > Stylus to customize preferences like sensitivity and hover actions. The Moto Note app is pre-installed, allowing you to take notes, sketch, or annotate documents seamlessly. Experiment with different tips and pressure levels to achieve desired results. For optimal performance, avoid using the stylus near water or extreme temperatures. Regularly clean the stylus tip with a soft cloth to maintain accuracy. If the stylus is lost or damaged, refer to the manual for replacement options. By following these steps, you can unlock the full potential of your Moto G Stylus and enhance your productivity and creativity.
4.2 Using the Moto Note App
The Moto Note app is a powerful tool designed to enhance your productivity with the Moto G Stylus. To access it, locate the app icon on your home screen or in the app drawer. Upon opening, you’ll be greeted with a clean interface allowing you to create new notes instantly. Use the stylus to write or draw with precision, and explore various formatting options like font styles, colors, and thickness. The app also supports annotating images and PDFs, making it ideal for work or study. Organize your notes into categories or folders for easy access. Sync your notes across devices using your Motorola account. Additionally, the app offers handwriting-to-text conversion, voice memos, and the ability to set reminders. Regular updates ensure new features are added, so keep the app updated for the best experience. By mastering Moto Note, you can streamline your workflow and make the most of your Moto G Stylus.

4.3 Adjusting Stylus Settings for Optimal Use
To ensure the best experience with your Moto G Stylus, customize the stylus settings according to your preferences. Open the Settings app and navigate to the “Stylus” or “Advanced” section, depending on your device. Here, you can adjust sensitivity levels to match your writing style. Enable palm rejection to prevent accidental marks while writing. Explore pressure sensitivity adjustments to fine-tune line thickness and accuracy. Additionally, customize button functions on the stylus to quick-launch apps like Moto Note or other productivity tools. Calibration options are also available to optimize accuracy. For left-handed users, enable reverse touch detection to improve performance. Regularly clean the stylus tip to maintain responsiveness. Visit the Motorola support page for detailed guides or updates. By tailoring these settings, you can enhance precision and comfort, making the stylus an indispensable tool for creativity and productivity.
4.4 Finding or Replacing a Lost Stylus
If you misplace your Moto G Stylus, there are steps to locate or replace it. First, check the phone’s settings for a “Find My Stylus” feature, which may show its last known location. If it’s nowhere to be found, visit Motorola’s official support page to purchase a replacement. Ensure compatibility by selecting the correct model. To replace, simply pair the new stylus with your device. Regularly clean the stylus tip to maintain responsiveness and avoid damage. For additional assistance, refer to the user manual or contact Motorola support. By following these steps, you can ensure uninterrupted use of your Moto G Stylus’s unique features.
Moto G Stylus Battery Life and Charging
The Moto G Stylus features a robust 5,000mAh battery, offering extended usage. Use Motorola’s 30W fast charger for quick top-ups. Optimize settings to maximize life and ensure efficient charging performance.
5.1 Tips for Maximizing Battery Life
To ensure your Moto G Stylus lasts throughout the day, follow these tips:
- Adjust screen brightness and timeout settings to reduce power consumption.
- Enable low-power mode when battery levels are critical.
- Close unused apps and background processes regularly.
- Limit the use of high-drain features like GPS and video playback.
- Update your phone to the latest software for optimized performance.
- Avoid extreme temperatures that can drain the battery faster.
- Charge your phone properly—avoid letting it drop to 0% too often.
- Use the original Motorola charger for faster and safer charging.
By implementing these strategies, you can enjoy extended battery life and maintain your Moto G Stylus’s performance over time.
5.2 Understanding Battery Usage Patterns
Understanding your Moto G Stylus’s battery usage patterns is key to optimizing its performance. The phone’s battery life depends on various factors, including screen brightness, app usage, and connectivity. High-drain activities like gaming, video streaming, and GPS navigation consume more power. To monitor this, go to Settings > Battery > Battery Usage, where you can view detailed statistics about which apps and processes are using the most power.
- Screen time is often the largest drain on battery life.
- Background app refresh and notifications also contribute to power consumption.
- Enable dark mode to reduce OLED screen power usage.
- Limit unnecessary app updates and syncs.
By analyzing these patterns, you can identify areas to adjust your habits and extend battery life. Regularly monitoring your usage helps you make informed decisions to optimize performance.
5.3 Using Fast Charging Effectively
To maximize the benefits of fast charging on your Moto G Stylus, ensure you’re using the correct equipment. Motorola recommends using the official 30W charger that comes with the device for optimal performance. Avoid using third-party cables or adapters, as they may not support fast charging and could potentially damage your phone.
- Always charge your phone on a cool surface to prevent overheating, which can slow down charging speed.
- Close unnecessary apps or switch to Do Not Disturb mode to minimize power consumption during charging.
- Avoid letting your phone battery drain completely to 0% on a regular basis, as this can reduce long-term battery health.
By following these guidelines, you can ensure your Moto G Stylus charges quickly and maintains its battery performance over time. Fast charging is most effective when the battery level is between 0% and 80%, so consider unplugging once it reaches this point to preserve battery longevity.
Software and Connectivity Features
The Moto G Stylus runs on the Android operating system, offering seamless integration with Google services and essential apps. It supports Wi-Fi and Bluetooth connectivity for reliable wireless connections and efficient file transfers.
6.1 Navigating the Android Operating System
Navigating the Android operating system on your Moto G Stylus is intuitive and user-friendly. The home screen displays essential apps, widgets, and shortcuts, while the app drawer houses all installed applications. Swipe up from the bottom to access the app drawer or use gestures for navigation; The recent apps button allows you to switch between open applications seamlessly. Customize your home screen by adding widgets, folders, or shortcuts for quick access to frequently used features. The Settings app provides options to personalize your experience, such as adjusting display settings, managing notifications, and configuring system preferences. Android’s intuitive design ensures that you can easily find and use the features you need. Whether you’re a new user or familiar with Android, the Moto G Stylus offers a smooth and responsive experience tailored to enhance productivity and entertainment.
6.2 Connecting to Wi-Fi and Bluetooth

Connecting your Moto G Stylus to Wi-Fi and Bluetooth devices is a straightforward process. To connect to Wi-Fi, go to the Settings app, select “Wi-Fi,” and toggle it on. Choose your desired network from the list, enter the password, and connect. For Bluetooth, navigate to Settings > Bluetooth, enable it, and pair with nearby devices. Once paired, you can transfer files, connect to accessories, or stream audio. Ensure both devices are in pairing mode for a smooth connection. If you encounter issues, restart your device or reset network settings. The Moto G Stylus supports Wi-Fi 5 and Bluetooth 5.0 for fast and reliable connections. Use these features to enhance your smartphone experience with seamless connectivity to the internet and external devices.
6.3 Updating Software and Security Features
Keeping your Moto G Stylus up to date ensures optimal performance, security, and access to the latest features. To update your software, go to Settings > System > Advanced > System Update. Check for updates and follow the prompts to download and install the latest version. Regular updates improve functionality, patch vulnerabilities, and enhance device security. For added protection, enable Google Play Protect in the Play Store settings to scan apps for malware. Additionally, review app permissions periodically to ensure only trusted apps have access to sensitive data. Motorola also recommends using a screen lock, such as a fingerprint or face unlock, to secure your device. By staying updated and following these security practices, you can protect your Moto G Stylus from potential threats and enjoy a seamless user experience. Visit the Motorola support page for more details on software updates and security features.

Troubleshooting Common Issues
Troubleshooting your Moto G Stylus can resolve many common issues effectively. If your device overheats, ensure it is not exposed to direct sunlight or heavy usage for extended periods. For battery drain, review power-saving settings and close unused apps. Connectivity problems, such as Wi-Fi or Bluetooth issues, can often be fixed by restarting your device or resetting network settings. If the stylus isn’t functioning, check for debris or re-calibrate it in the settings. For app-related issues, clear the app cache or uninstall updates. If your screen is unresponsive, perform a forced restart by holding the power button for 10 seconds. Visit the Motorola support page for detailed guides and FAQs to address specific problems. Regular software updates also help resolve bugs and improve performance. By following these steps, you can quickly identify and fix common issues, ensuring your Moto G Stylus runs smoothly.